Stay in Touch
Subscribe to our newsletter to be informed of the latest product launches.
Let’s be very clear: there are a number of quality unibody AR scope mounts on the market today from brands such as Reptilia and others. So as long as you stick to a reputable manufacturer, the question is less about quality, and more about features. What scope mount does what you need it to do?
This article is to help you determine if the Reptilia AUS scope mount is right for your applications.
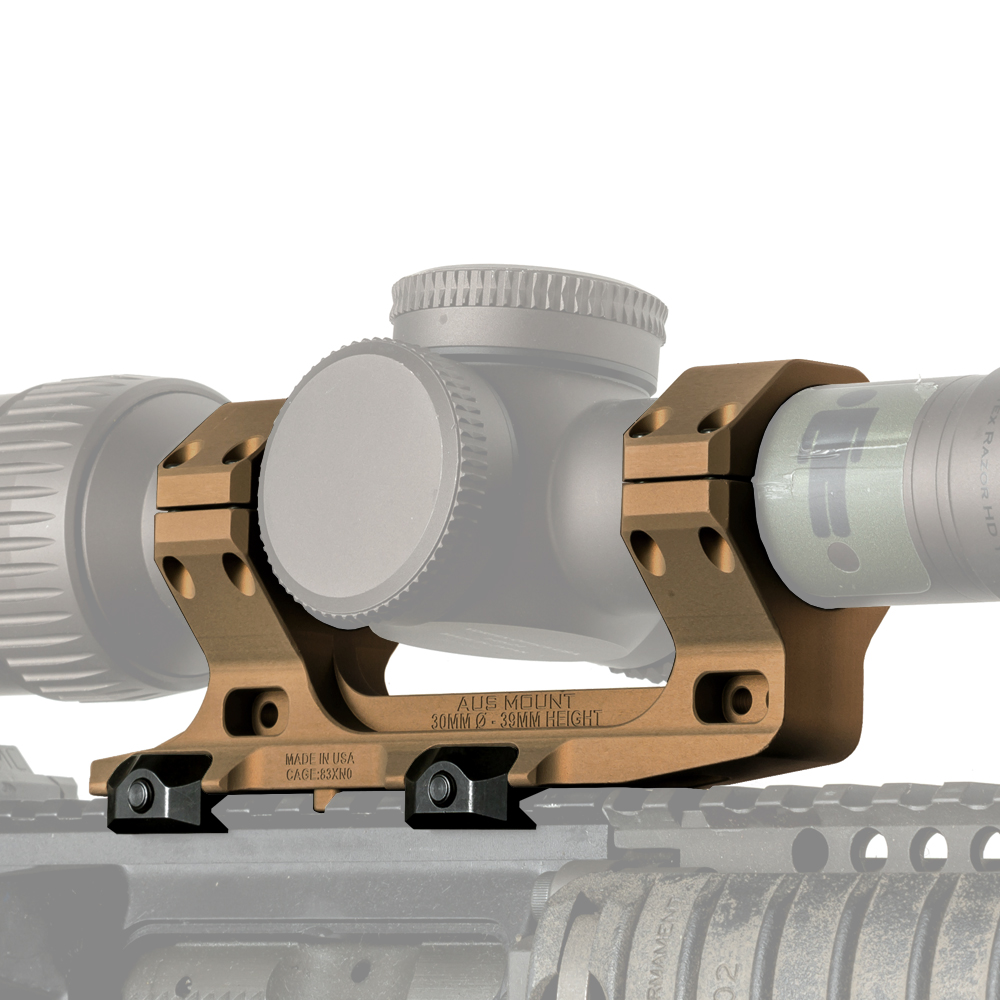
Reptilia 30mm AUS Optic Mount in Flat Dark Earth anodized finish.
Let’s get the biggest elephant out of the room: price. Any high quality scope mount is going to be cut from 7075-T6 aluminum or other exotic alloy. The best mounts are cut from solid blocks of billet material, where a 2-pound bar of aluminum is reduced to no more than a few ounces of metal in the finished part. On Reptilia mounts, deep laser engraving is done prior to metal finishing to ensure a subtle aesthetic on all logos and text. The aluminum parts are coated with MIL-STD Type III Class 2 Hardcoat anodized finish. All steel hardware is custom machined and finished with corrosion-resistant Ferritic nitrocarburizing (FNC), also known as black nitride or “Melonite”. The spring-loaded hardware is installed, inspected, packaged, and shipped without a single process taking place outside the United States.
All of that to say these mounts are not cheap to produce. We are not making Chinese airsoft parts.
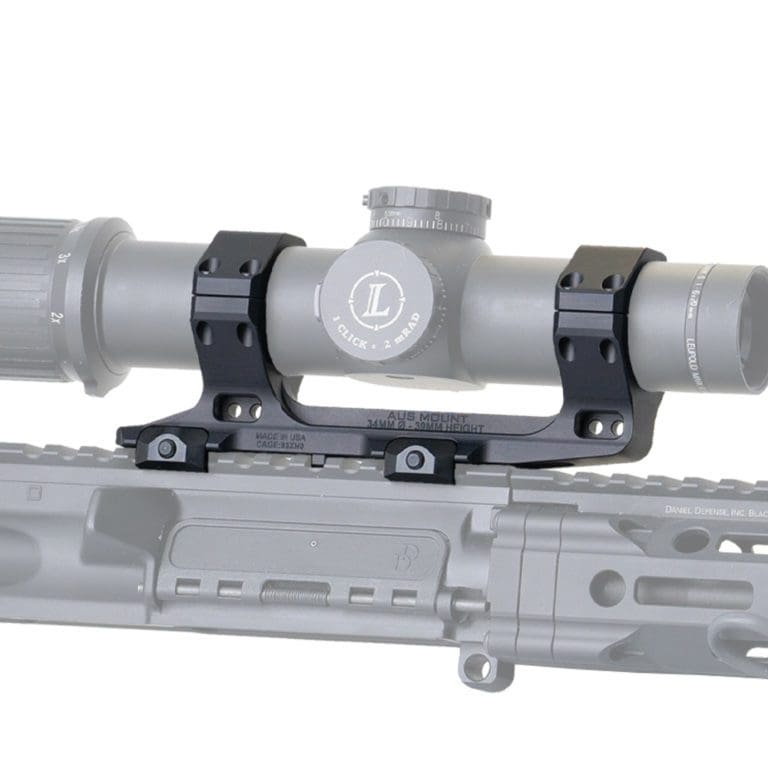
This seems obvious, but it isn’t to everyone: choose the make and model of your scope before choosing a mount. This is important because the diameter of the main tube of each scope is different, generally 30mm, 34mm, or 35mm depending on the exact scope. With a unibody scope mount you want to make sure the spacing between the rings matches the scope you have chosen.
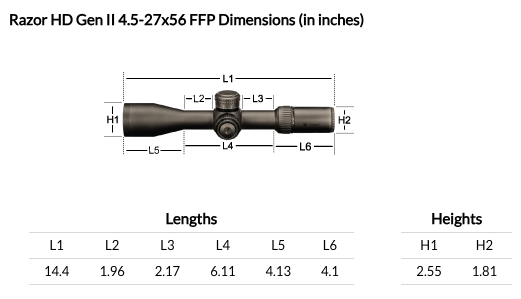
Dimensional drawing of Vortex HD Gen II 4.5-27×56. Photo credit: Vortex Optics
One of the most hotly contested features of scope mounts is quick detach (QD) vs. not. In reality, there are exceptionally few real world use cases for QD mounts outside of clip-on electrooptics. If an optic is removed from a weapon and re-installed, it should always be double checked to confirm zero. The argument that you might need to quickly remove an optic if it malfunctions in a fight is even more unlikely.
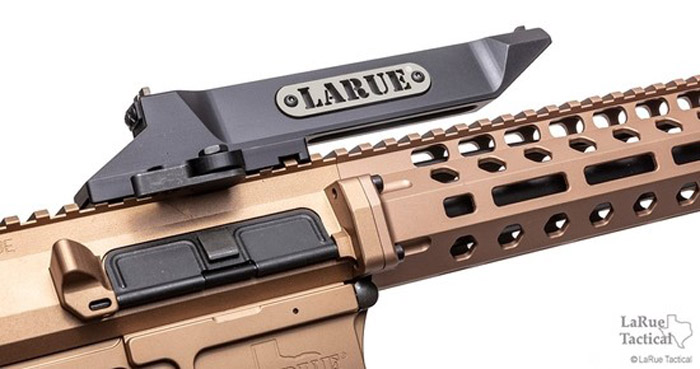
The Quick-Detach C-Note iron sights by LaRue Tactical are a curious product, indeed.
Recent years have seen an explosion in the use of MRDS at secondary sighting devices in conjunction with magnified optics. Some of the most popular variants are the Trijicon RMR/SRO, Leupold Delta Point Pro, Aimpoint Micro T-2, Aimpoint ACRO, Steiner Optics MPS, and more.
The reason MRDS are becoming more popular is two fold: 1) reliability and durability of MRDS optics has reached the point where they are arguably on par with non-battery powered back up iron sights (BUIS), and 2) the advent of low variable power optics (LVPOs) has necessitated a solution for rapid engagement of close-range targets. Simply put, attempting to engage a moving target at short range with a magnified scope is quite difficult, so the ability to rapidly transition to a non-magnified red dot adds significant close-quarters capabilities.
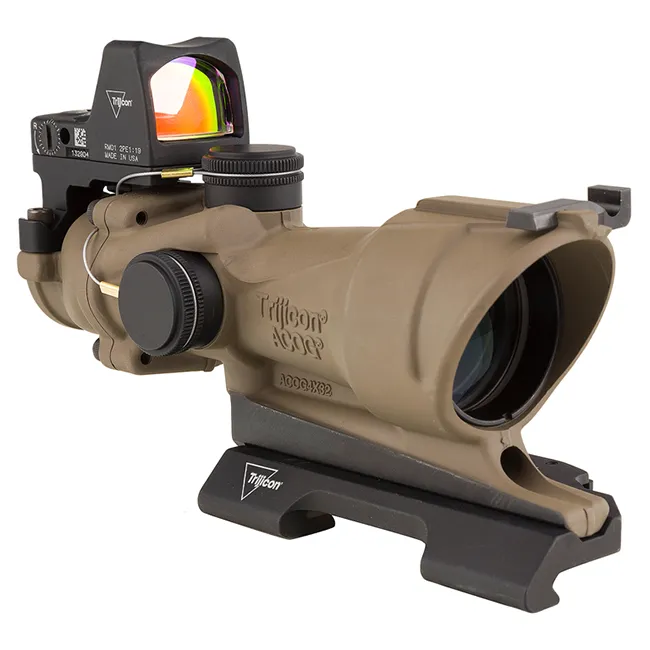
The Trijicon 4x ACOG with RMR MRDS piggyback optic was one of the first examples of a magnified optic being supported by a non-magnified red dot back up sighting device.
The AUS provides two options for MRDS mounting. First, the shooter can replace the top ring of their AUS or Geissele Super Precision mount with a Reptilia ROF MRDS mount at the 90° or 45° position. This requires the shooter to simply break their cheek weld and raise their head slightly to find the dot either above or between the turrets depending on user preference. The Reptilia ROF are available for the most common MRDS optics including the Trijicon RMR, Aimpoint Micro, Aimpoint ACRO, Leupold Delta Point Pro, Steiner MPS, and more red dots that utilize this footprint.
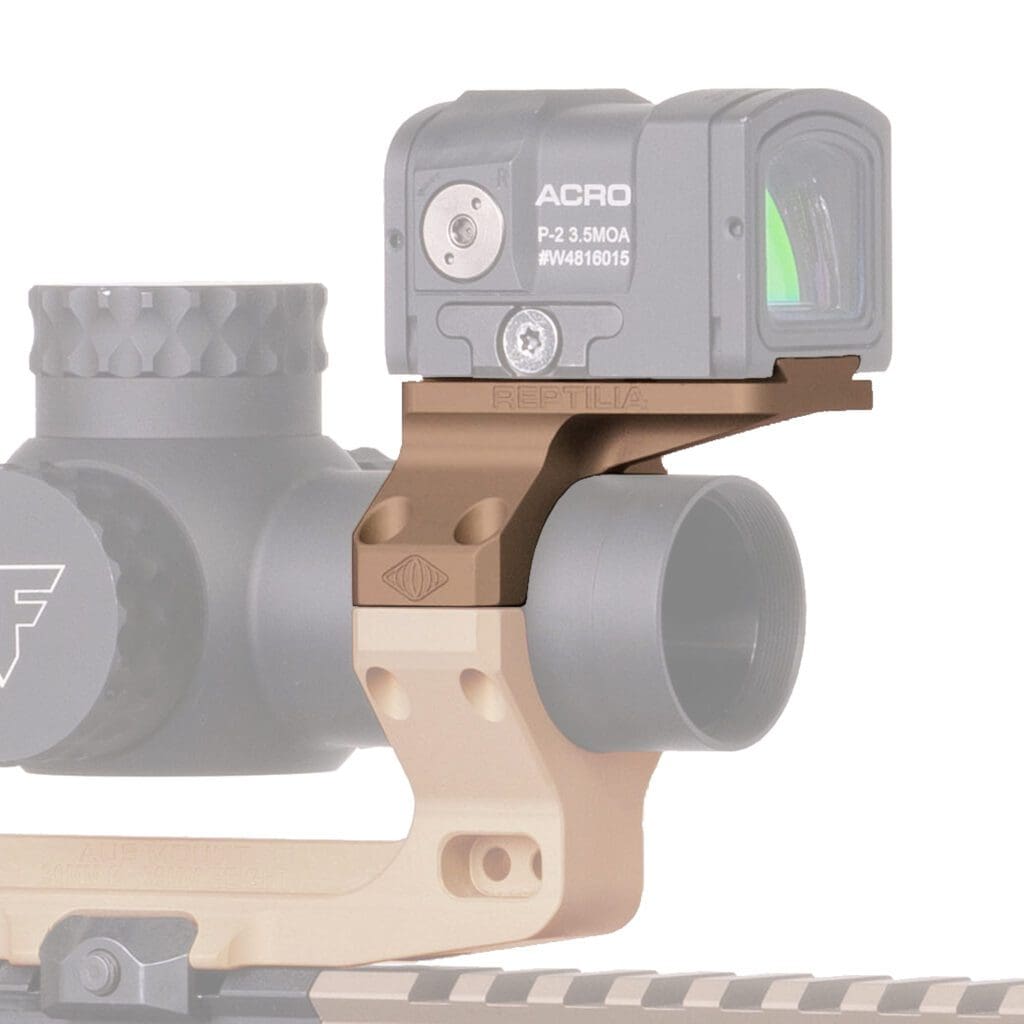
Reptilia AUS Mount with Reptilia ROF-90 for Aimpoint ACRO MRDS Piggyback Mount.
The second option for MRDS mounting on the AUS is to utilize the AUS Offset Mounts to position a red dot at the 45° position on the left or right side of the scope. This solution maximizes rail space, and simply requires the shooter to rotate the rifle 45° to the side in order to acquire a sight picture. Currently available for the Leupold Delta Point Pro and Aimpoint ACRO footprints, the AUS Offset Mount line will be expanding significantly in the coming months.
Long range shooting technology has progressed dramatically over the last 10 years. One such advancement is compact weapon-mounted laser range finders such as the Wilcox RAPTAR S. Designed at the request of a US DoD customer, the Reptilia ROF-Diving Board is fully compatible with both the Geissele Super Precision and Reptilia AUS family of mounts. Optimized for the NightForce ATACR 7-35, the ROF-Diving Board positions the RAPTAR S or other laser designator at the 12 o’clock position as low as possible without interfering with the ADUNS clip-on device.
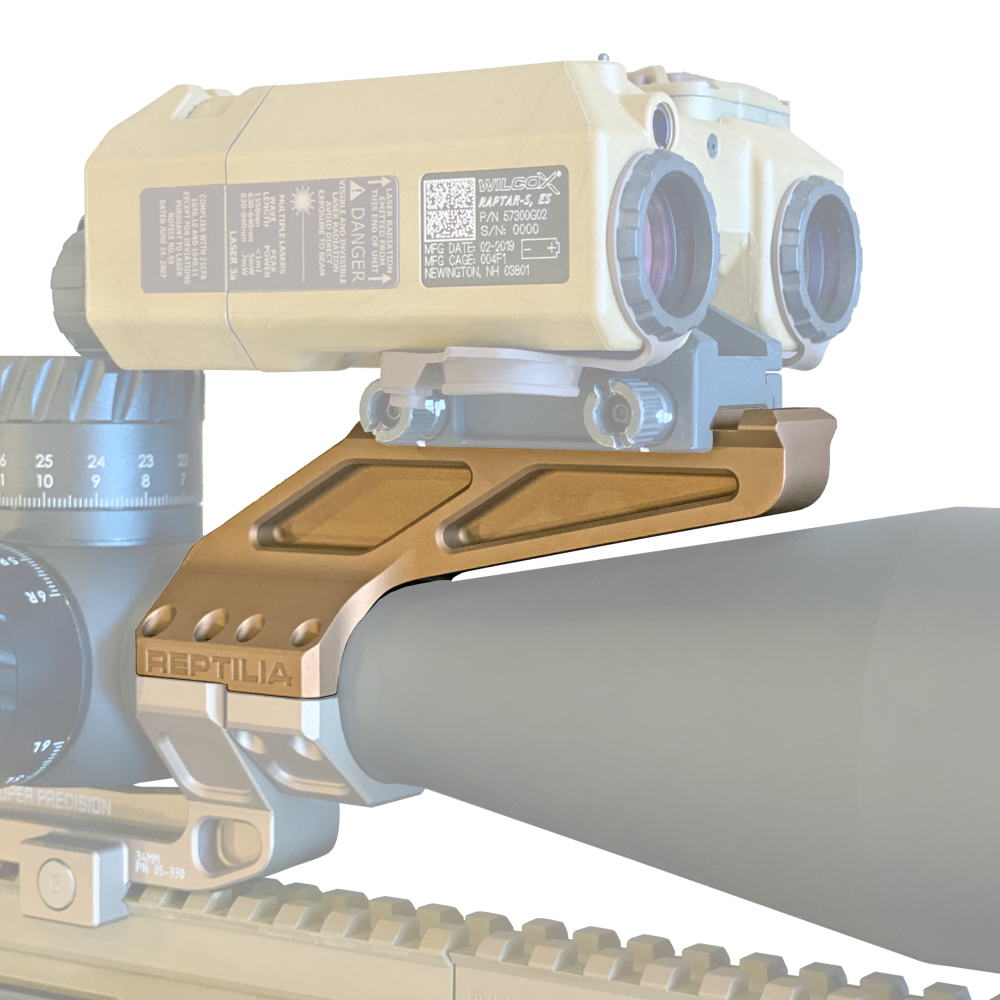
Reptilia 34mm ROF-Diving Board with Wilcox RAPTAR-S laser range finder.
The AUS utilizes two simple nitride coated cross bolts and spring loaded locking clamps to securely attach to any M1913 Picatinny rail. The installation process goes as follows:
Keep things as simple as possible, and in the end, decide what features and functionality are necessary for your application. Do you really need a $5000 laser range finder? Probably not. Do you need a back-up MRDS? Quite possibly, yes. The beauty of the AUS lies in its modularity – you can start with the basics, then add functionality as necessary. Ultimately, it’s your money and you should buy whatever equipment is best for your needs, then get outside and use it!